How to cook "with visual instructions" "using familiar ingredients from your local grocery stores" healthy, traditional and delicious Japanese dishes!!
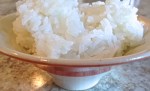
Today I introduce you to “How to cook Japanese rice perfectly and easily”. If you have a rice cooker, you can just follow their directions. But if you don’t have one, this is the easiest recipe for perfect Japanese rice.
Steamed rice is a staple food in Japanese cuisine. Japanese rice has soft texture and rice grains are shiny when it is cooked! We mostly eat rice two or three times a day. Even when we don’t cook, most super markets and convenience stores have many kinds of rice balls and rice products can be cooked in microwave.
Lately, some people add multi-grain rice to white rice when it is cooked to make the dish healthier but steamed white rice remains perennial favorites.
Find dried short-grain white rice, not “sweet sticky rice”.
Wash and soak rice for 30 minutes before cooking.
The heat level is the key. Once it boils, turn down the heat to very low not to get burned.
Do not open the lid when it is cooking even if it bubbles over. Wait patiently.
Steam the rice for 10 minutes after cooking.
Detailed and visual instructions can be found in the recipe PDF: Japanese rice
Tips for storing cooked rice;
Put one portion of cooked rice without cooling down in a glass container with a lid or freezer bag, or wrap with plastic wrap. Store in the freezer and use within 3 weeks. When you eat, put unwrapped frozen rice on a microwave-safe plate and microwave for 2 to 3 minutes with a cover.
The key to store is to freeze the rice without cooling so it has fresh cooked rice taste even after storing for 3 weeks in the freezer.
Today I introduce you to “Tofu and Tomato Salad”. This dish is super easy but so delicious and a very nutritious salad!!
In this recipe I roasted sliced tomato and tofu in the oven, but roasting is totally optional. You can make this salad without roasting! You might want to drain the tofu with paper towels and weights. See how to drain tofu here. Sesame Tofu Recipe
The reason I cook the tomato is because the nutrition from the tomato increases when it is cooked, and more importantly I like soft and sweet tomato! If you don’t like tofu aroma very much, I highly recommend cooking the tofu and eating with lemon juice, which I use for the dressing in this recipe.
Here is a little tip to store tomatoes. For good keeping, wrap a tomato individually with plastic wrap and store in the vegetable compartment of the refrigerator. It willkeep longer then when it is stored in the refrigerator on its own.
The recipe is
Slice a tomato and tofu. Roast 10 minutes 400 °F. Drizzle with dressing which is a mixture of lemon juice, extra virgin olive oil, salt and pepper.
Detailed and visual instructions can be found in the recipe PDF: Tofu and Tomato Salad
Ingredients (1 serving)
¼ pack Firm Tofu
1 Medium Tomato
½ Tbsp. Extra Virgin Olive Oil
Lemon Juice from ½ Small Lemon
Salt and Pepper
Detailed and visual instructions can be found in the recipe PDF: Tofu and Tomato Salad
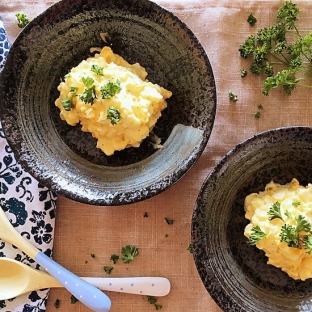
Today I introduce you to “Simple Japanese Egg Salad”. It is a quick and easy recipe but very scrumptious!! (*When you use gluten-free mayonnaise, this becomes a gluten free dish. Japanese mayonnaises mostly contain small amount of gluten as an ingredient “Brewed Vinegar”)
In Japan, we usually use this for sandwiches. But if you want to add one more dish in your meal, this is best because it is a fuss-free recipe.
I use fresh eggs and boil them myself. If you have boiled eggs in your refrigerator, you might want to use them. It saves more time.
The recipe is very easy.
Boil eggs for 12 minutes. Peel in cold water. Crumble the peeled eggs and season with mayonnaise, salt and pepper.
*Detailed and visual instructions can be found in the recipe PDF: Japanese Egg Salad
Ingredients (servings 2)
3 Eggs
4 Tbsp. Mayonnaise
Pinch of Salt and Pepper
Minced Parsley (to taste)
Boiled Water for boiling eggs
Detailed and visual instructions can be found in the recipe PDF: Japanese Egg Salad
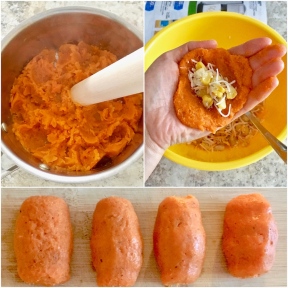
Today I introduce you to Cheesy Sweet Potato Croquettes. I put shredded cheese and corn kernels in mashed sweet potato so it is very cheesy, creamy and incredibly tasty!!
I use sweet potato instead of regular potato because it is healthier. Sweet potato is high in vitamin C, potassium and fiber. And it also has a low GI (glycemic index). This means sweet potato doesn’t make our blood sugar rise quickly or as much as foods with a higher GI, even though it contains carbohydrate. It is healthier to eat low GI foods first during your meals. You might want to consider the order in which you eat things to avoid raising your blood sugar quickly.
Croquettes are very filling and delicious. They are not only good as a main dish but also for kids’ snacks after school. You may think that frying is too much work but this delicious dish is totally worth it. We can cook a lot of croquettes at once and store in the freezer before frying.
The recipe is
Mash boiled sweet potato. Wrap cheese and corn kernels mixture with the mashed potato.
Today I introduce you to “Fried Tofu” which is called “Gan-Modoki” in Japanese.
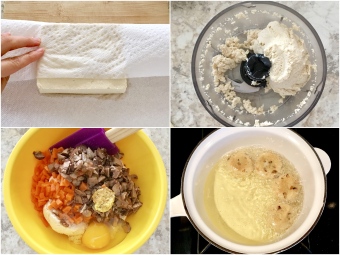
I am sure this is going to be your new healthy delicious tofu dish!! During the cooking preparation I process the tofu, so it has a very soft and silken texture. The seasonings are soy sauce, ginger and salt so it is incredibly flavorful. Therefore, this tofu dish even makes people who don’t like tofu very much enjoy it because they don’t think it is made from tofu!
The recipe is:
Drain tofu, smooth the tofu with a food processor, mix with vegetables and seasonings, and fry.
You can enjoy the fresh and hot fried tofu itself. Also it is great to simmer it in chicken soup with some vegetables!
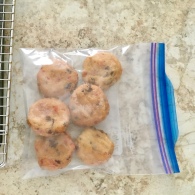
To store, place the fried tofu in a plastic bag and keep in the freezer.
Please do not drain the used oil in the sink. Put some kitchen papers in a can or a jar which you don’t need and pour the cooled used oil in. Throw it out as regular garbage.
Ingredients (12 balls) *Click BLUE TEXT to link to the product on Amazon*
Today I introduce you to “Japanese Fried Chicken with Egg Drop Dashi”.
This is a very delicious dish and is a popular dish in Japan. It is fried chicken breast in an egg-drop Dashi soup. Japanese fried food has very thin batter and a crunchy texture. We add the soup to the chicken right before we eat it so that we can enjoy the flavorful soup and crunchy fried chicken together. Mostly the dish is put on steamed rice so it is called Donburi. It provides carbohydrate and protein in one bowl so we usually have this during the busy lunch time.
The recipe is
(Fried Chicken)
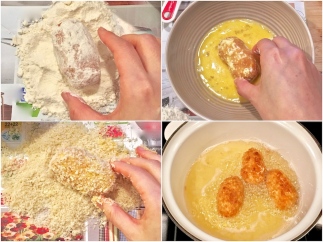
Season a chicken breast with salt and pepper and batter with flour, beaten egg and bread crumbs. (See the picture, I sometimes use a supermarket flyers or newspaper to batter with flour and bread crumbs. This makes easy to cleanup!)
Fry about 5 minutes on each side. Slice and place on a plate.
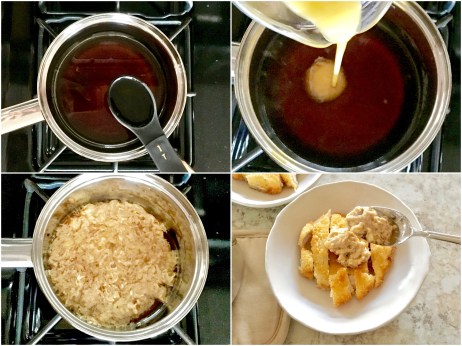
(Egg-Drop Sauce)
Heat Dashi stock, sugar, cooking Sake, soy sauce and Mirin in a pan and pour beaten egg in the boiled soup.
Pour the egg-drop dashi soup on the fried chicken and sprinkle with green onion (to taste) right before serving.
I used bonito dashi stock but you can use any kind of stock. This is a Japanese style dish so It would be better to use bonito, shiitake mushroom, kelp, or anchovy dashi stock if it’s possible.
If you frequently want to add chopped green onion with a minimum of fuss to your dishes, here is a tip to store the chopped green onion. When you have time, chop some washed green onion, dry with paper towels, put in a plastic zipper bag and keep it in the freezer. Use within a month. You can add some to your dishes without defrosting.
Ingredients (servings 2) *Click BLUE TEXT to link to the product on Amazon*
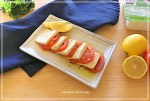
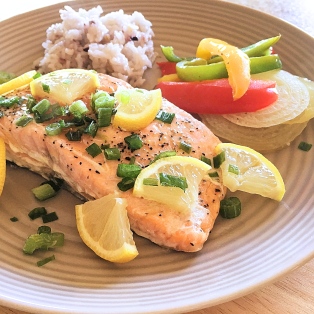
Today I introduce you to Steamed Salmon with Butter. The dish is very tasty and is great for fancy dinners, but it is so easy because it is cooked in the oven. You can do other things while the meal cooks. Plus the cleanup is also easy because the salmon is wrapped with foil. Best of all, because the salmon is wrapped and cooked, the dish has great flavor and a very tender and juicy texture, which is very difficult to achieve when salmon is baked.
Salmon is high in omega-3 fatty acids (EPA and DHA), and high in vitamins. More important still, salmon’s pink color is from Carotenoid Astaxanthin which is a very strong antioxidant material. However, today we see mostly farm-raised salmon in stores and the salmon may be bred to make their color brighter. So you should choose wild salmon if you can.
The recipe is very easy.
Preheat oven to 400 °F. Place some sliced onion on greased foil. Put salmon on the onion. Season with salt and pepper, and put some butter on the salmon. Add any side vegetables you like. Cook in the oven for 25~30 minutes (depending on the thickness of salmon). I recommend thinner salmon for all salmon recipes because it is easy to cook through evenly and quickly.
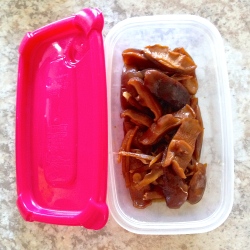
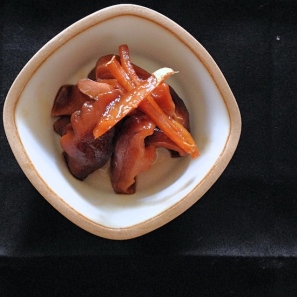
Today I introduce you to a Japanese traditional side dish which has a sweet-savory taste. In this recipe, various ingredients are slowly simmered in the sauce so that the ingredients have great flavor and great taste. I can’t stop eating it when I make it because it is so delicious!!
I used shiitake mushrooms and ginger this time.
Shiitake mushrooms are low in calories and also are a nutritious vegetable. They are high in vitamin D, fiber and vitamin B. If grocery stores near you don’t have fresh shiitake mushrooms, you can use dried shiitake mushrooms. Dried shiitake mushrooms have more vitamin D than fresh ones. The day before cooking, soak in water to reconstitute in the refrigerator.
As you know ginger is also very nutritious. It makes our metabolism active and our body warm. The dish has a lot of awesome ginger flavor! If you or your family don’t like ginger’s pungent taste very much, you can cook the dish without ginger.
Here are some tips to store shiitake mushrooms and ginger. I always freeze shiitake mushrooms in a zipper plastic bag. Cut to the proper size for the dish and cook without defrosting. Use within 1 month. I also freeze peeled fresh ginger and wrap it with aluminum foil. I use it within 3 month.
The recipe is very easy and you only need a pan.
Put prepared ingredients together in a pan at same time.
If you like vinegar taste, you can add 1~2 tsp. of rice vinegar as a secret ingredient. Delicious!!
Simmer with aluminum foil cover to cook and macerate evenly.
*Detailed and visual instructions can be found in the recipe PDF: Shiitake Mushrooms Side Dish
To store, transfer it to a clean container and keep in the refrigerator. Use within 7 days.